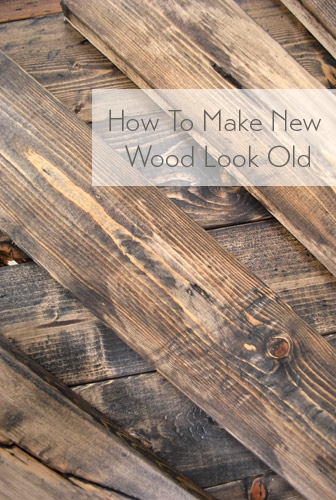
How to Make Wood Look Old and Distressed
Originally Published: April 21, 2011. Updated 2019.
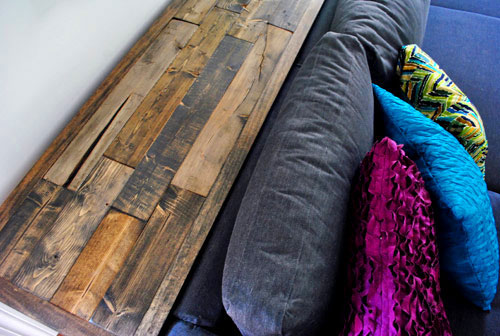
We wanted a weathered, rustic wood look to the top of the DIY console storage table we built, but we couldn't just make old, reclaimed barn wood or aged shipping pallets appear out of thin air. Instead, we had to find ways to turn new store-bought whitewood from Home Depot into something that looked like it had a story to tell. So here are the easy steps we took to turn that pristine wood into the old-looking, distressed tabletop we imagined. We've even got a video of our process in action!
Making this new wood look old wasn't just easy to do, it was actually kind of fun. The final look was achieved with a one-two punch of:
- A variety of distressing techniques
- Applying wood stain strategic
And spoiler, there's almost some literal punching involved. Although it just involved some objects we had around the house, not our actual fists. Phew! So let's get started:
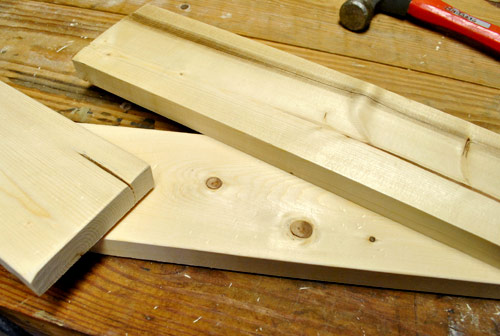
Step 1: Purchase New Wood With Imperfections
Our project called for 1×4″ boards and we purchased the cheap whitewood from Home Depot. Not only is it affordable, but it's hardly pristine to start with. So I tried to pick out boards that already had flaws or interesting texture details like knots, chips, dark stripes, etc.
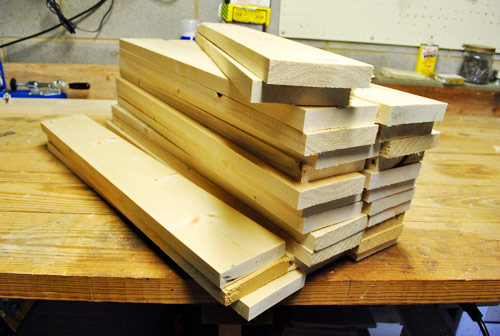
Step 2: Make Your Cuts
Before distressing our wood, we cut each 8ft board into 2ft lengths, since we wanted sort of a "patchwork" look to the top of our console. It's best to cut your wood to length ahead of time, if possible, so that you can distress all sides of it at one time. Otherwise you may expose your new wood (literally) when you make your cuts, and have to repeat some of these steps.
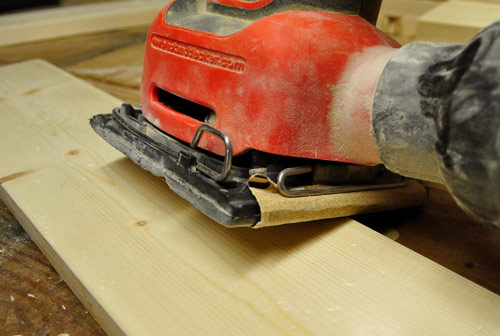
Step 3: Sand The Edges
The sharp corners and crisp edges of the store-bought wood was a dead giveaway that it was new. So before I got to beat up any of the boards, my first step was sanding the four edges on the top of each board using my palm sander. This wore down the crisp edge into a rounder and smoother one, so they looked older right off the bat.
Knowing that I had some extras, I tried a bunch of things on a spare plank before really landing on a process (well, "process" is too strong of a word in this case, since it was pretty much a random exercise in let's-see-what-happens).
Step 4: Start Beating Up Your Boards
I tried a handful-ish of techniques to create that aged wood texture and then used them sporadically throughout my pile. That way I'd end up with a mix of weathered looks, almost as if the boards had been scavenged from a few different sources after lots of character-creating trials and tribulations. So I'm going to show you all the different things we tried, but keep in mind that you don't have to do EACH technique on EVERY board.
Oh and if you're someone who likes all the details, I managed to capture a lot of my weathering "process" on video (so watch this if you want the "bonus stuff" that's not all outlined below):
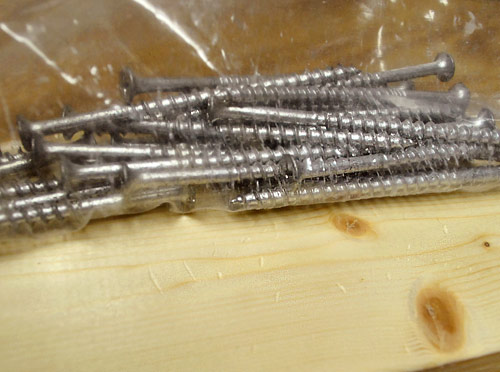
Trick #1: Smack It With A Bag of Screws
The first thing we tried was smacking each board with a Ziploc bag full of coarse screws. I actually did this to each piece and ,besides sanding, it's the only thing I did on all of them. It gave each board some very subtle dings or divots (see below) and it was also kinda cathartic, if I'm being totally honest. Oh and I've heard that some people do this with metal chains, which sounds equally fun.
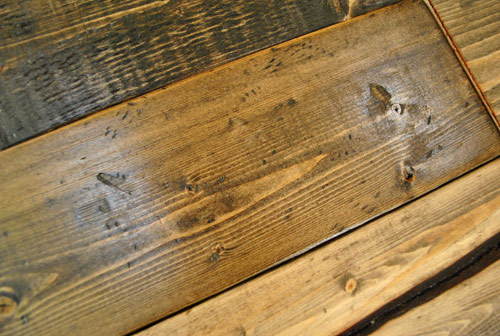
Because I know it's a bit tough to see the dings above, you can see them a bit more clearly on the final stained board below. Since stain catches and collects in all of these dents and dings, it tends to accentuate them – which is a good thing, in this case. This is the damage inflickted by the bag of screws.
Trick #2: Hit 'Em With A Hammer
On some boards, I also hit them with my hammer. Whitewood or pine is relatively soft, so it's easy to leave some dents with just a few light bangs. I liked to concentrate my hits in one spot because it looked more organic than having a few evenly spaced out hammerhead impressions. I was all about the cluster.

Once stained, they looked a little something like this:
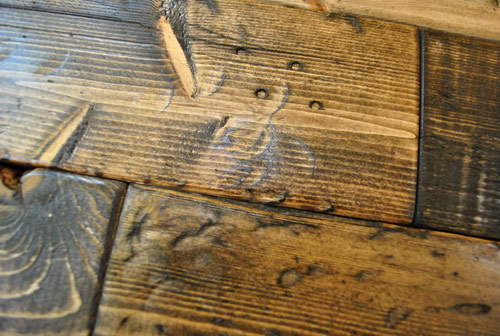
Trick #3: Break Out Your Nail Punch
In the shot above you can also see some of the "fake nail holes" that I made using an improvised nail punch (check out the video for more clarification on that method, which I couldn't photograph since it took two hands). It almost looks like a spot that an actual nail was hit through the board, without actually having to embed nails in your wood.
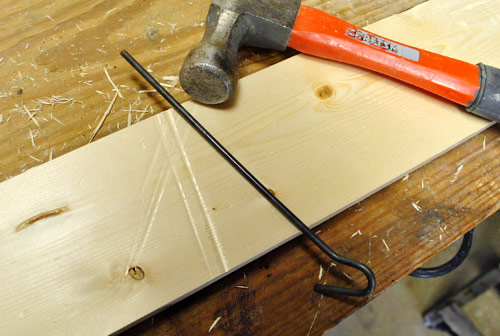
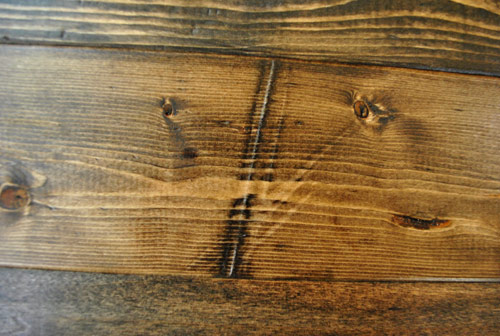
Trick #4: Make Long Impressions
I also used the same tool to make some line impressions across the boards. I just laid it down and hammered on top of it to create a nice long ridge. You could do the same with any long, thin object that can withstand the impact of your hammer (a long nail laid on its side would work great). I though it created the effect that some hard edge had bumped into it over the years.
I especially loved this effect once it was stained because it was so distinct. Why hello character, nice to meet you.
Trick #5: Scrape & Scratch It Up
Using a big screw that I found in the basement, I dragged the thread across the board which roughed up the wood grain. After sanding it down again it really started to look like the wood was slightly rotted, just like some of the spots on the pallets that we couldn't use (more on that here).
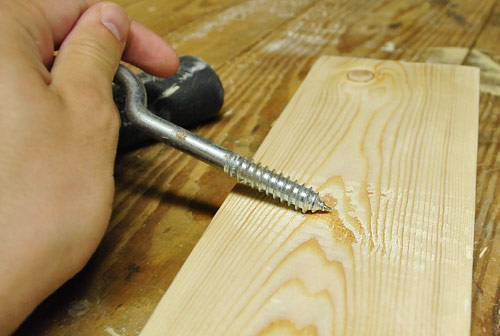
On a couple of boards I did this all the way up and down the length of the board, giving them a really cool and distinct look. Definitely far from the store-bought feel that they started with:
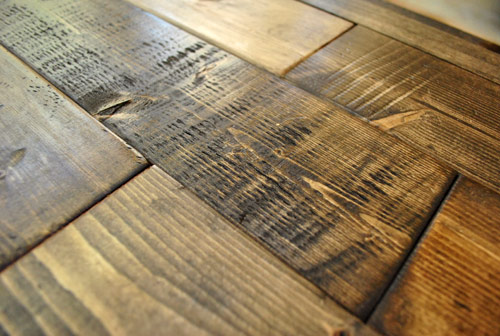
If you watched the video, you can also catch a couple of techniques that I forgot to photograph: namely dragging a paint can opener to make long smooth scrapes down the length of the board (another effect that I really liked after stain was applied) and making those nail punch holes that I mentioned earlier.
Step 5: Give It One Last, Light Sand
I'll be the first to admit that I probably overdid it when it came to trying so many different tricks – not to the detriment of the final result, just my own time. But since this kind of thing is my idea of fun, I'd do it all over again in a heartbeat. And after I had taken out all of my aggression worked my new-to-old magic and had given everything one last light sanding (to ensure a smooth and not splintery finish), it was time for Sherry to take over for the staining portion of The Console Table Show.
Step 6: Gather Your Staining Materials
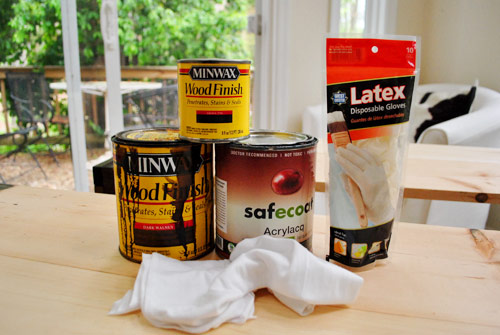
Get yourself set-up to stain your boards and gather your materials. Here's what we used:
- Rubber gloves (because wood stain is messy)
- A cheap $1 paintbrush or two like these (because stain is messy and tends to ruin good brushes)
- Spare rags to wipe up excess stain (because stain is… well, you know).
- Your stain, we tag-teamed the boards with two different stain colors – Ebony by Minwax, and Dark Walnut by Minwax (which we already had from staining the bottom of the console).
- Your sealer. Our favorite water-based non-toxic poly alternative, Safecoat Acrylacq, but you can also use polyurethane from your local hardware store.Just be sure to use something with a low sheen (matte is best) because anything glossy will make your wood look new again.
We made a video of this process too, in case you'd prefer to save yourself all of this pesky reading (and want all the deets instead of just the highlights). Plus Sherry's gloves make a fart sound, which is always a crowd pleaser.
But if you can't watch the video (or you prefer words to moving images), here's a quick rundown.
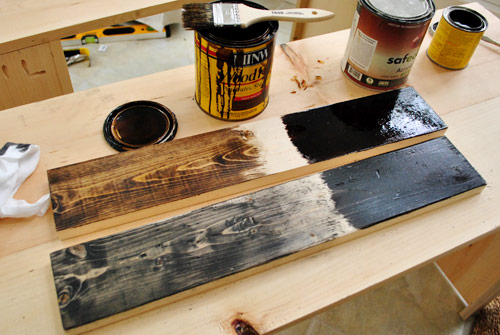
Step 7: Test Your Stain Colors
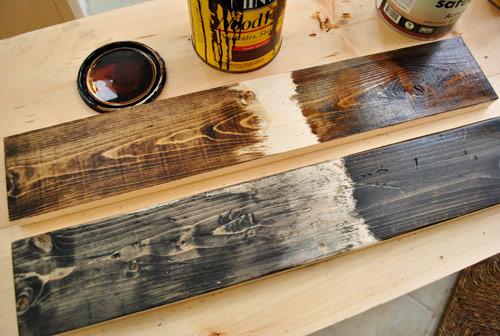
Keeping in mind that we wanted a fair amount of variation from board to board, Sherry did a few tests first to see what each of the stains looked like with a light coat of stain (wiped off quickly) and a heavy coat (which was allowed to penetrate for a bit longer). Here are the test boards with the light coats on the left and the heavy coats still soaking in on the right:
We actually ended up liking both stain colors. We thought the Dark Walnut would help it relate to the bottom of the console (as well as some of the other dark woods in the room) while the Ebony would be a closer match the the gray pallet boards that originally inspired us. In reality, on a lot of the boards Sherry actually ended up using a layer of each color to achieve a tone somewhere in the middle so nothing looked too jarring.
Step 8: Get Creative With Your Wood Stain
The only thing we didn't like was that we wanted to get some boards even lighter than the stain seen on the above left (which was applied thinly and then wiped away immediately). So Sherry pulled some weird technique out of her you-know-what and it ended up working perfectly. Basically she pre-washed the board with a light coat of plain water, let it soak in for a couple of seconds, and then went over the still-damp board with a light coat of stain (that way it soaked up less color thanks to the water that it absorbed first). For those who'd like more info, you can see this entire technique in action on the staining video.
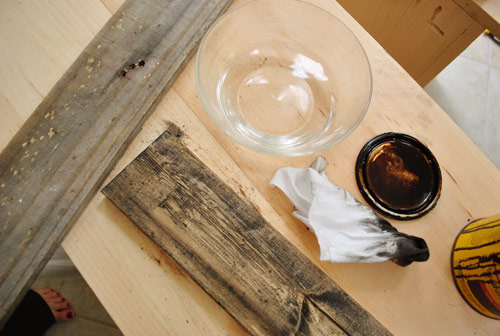
It was by far the closest that we got to replicating the look of the pallets (you can see a random pallet board on the left in the picture above for reference). But we're glad that it wasn't a perfect match, because we realized that the pallets were too blue-gray for our living room (since it's already dominated by a huge gray sectional with gray walls and gray beams we wanted to add some warmth and balance). So we were thrilled with the colors and the variations that we landed on, thanks to staining some and allowing the stain to penetrate a while, wiping it down right away on other boards, and using the water technique above to get some lighter variations. In the end, those brandspankinnew boards were all looking nice and rustic.
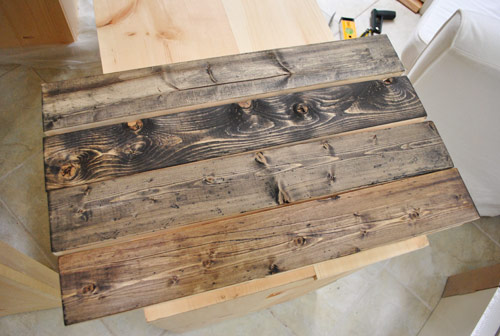
Step 9: Seal & Enjoy Your Finished Product
You can see how our finished project turned out in this post (which includes yet another video!). It also includes details about how we assembled the 2ft sections into a long tabletop.
*None of the products mentioned above have solicited these mentions. They're just the things that we purchased, used, and liked, so we shared some affiliate links to them for your convenience.*
Update – Wanna know where we got something in our house or what paint colors we used? Just click on this button:

How to Make Wood Look Old and Distressed
Source: https://www.younghouselove.com/how-to-distress-wood/